
We all know it: Excel tables rock. But sometimes you may want to separate table formatting from table functionality.
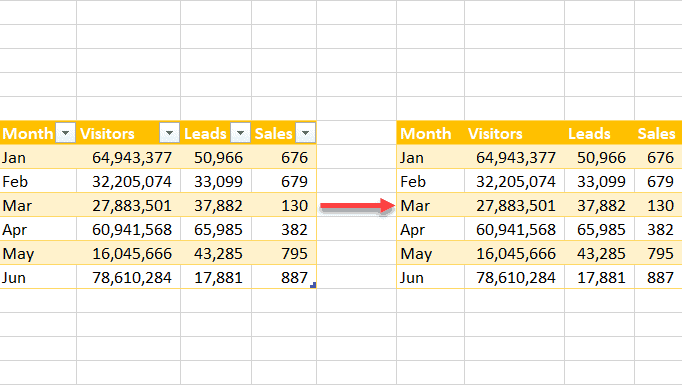
Thankfully, with just a few clicks, you can quickly convert your Excel table to a normal cell range while preserving the styling you applied to it.
In this article, you will learn three quick-and-dirty ways to do just that.
The Ribbon Method
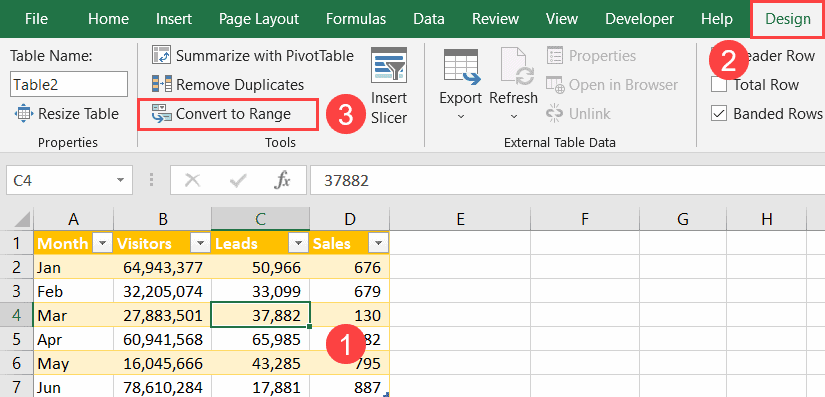
The first way to pull off the trick is to use the Convert to Range tool on the Design tab.
1. Select any cell in the table (A1:D7).
2. Go to the Design tab.
3. Select “Convert to Range.”
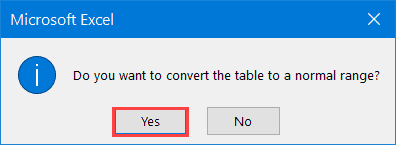
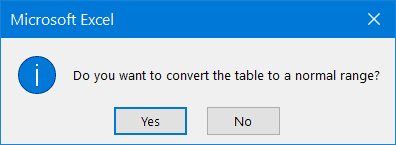
4. In the dialog box that appears, click “Yes.”
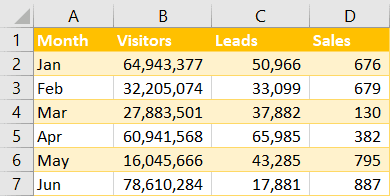
As a result, your table will be turned into a regular cell range.
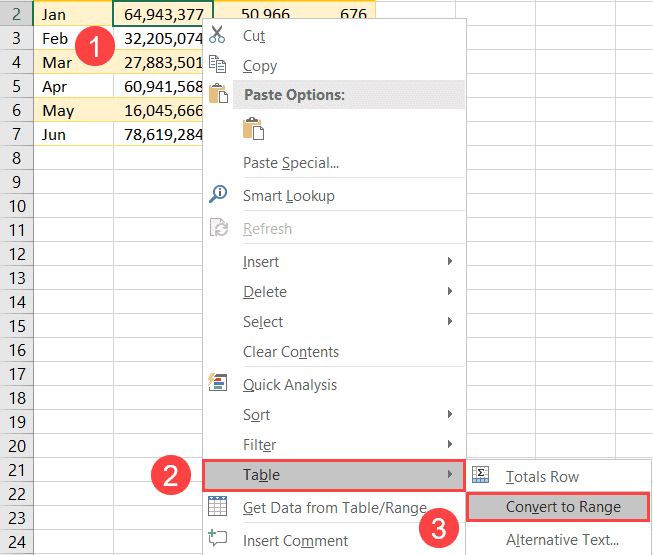
The Contextual Menu Method
Whew, that was quick! But if you’re looking to do the same thing even faster, use the contextual menu method.
1. Right-click on any cell in your table.
2. Select “Table” from the contextual menu that pops up.
3. Choose “Convert to Range.”
Click “Yes,” and you’re good to go.
The VBA Method
Finally, if you’re looking to learn how to convert a table into a cell range in Excel using VBA, create a new module and copy and run the following code into it:
Sub ConvertTableToNormalRange()

With Worksheets("Sheet1").ListObjects("Table1")
    .Unlist
End With
End Sub

This method has two values you might want to tweak:
- Worksheets (“Sheet1”): This value helps VBA locate the worksheet at the workbook level. Change the value from “Sheet1” to “Sheet2,” “Sheet3,” etc., based on where your table is placed.
- .ListObjects(“Table1”): This value specifies the name of the table you want to turn into a normal range. Replace “Table1” with the name of your table, which you can find in the Table Name field (Right-click on any cell in your table > Design > Properties > Table Name).

And that’s how you do it. You have just added three arrows to your Excel quiver to take your spreAnd that’s how you do it. Just like that, you have added three arrows to your Excel quiver to take your spreadsheet game to the next level.
