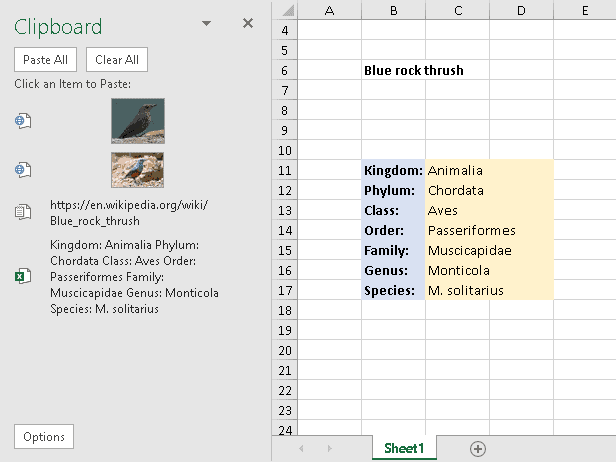
The term “copy-and-paste” has already become a set phrase for the simple and unimaginative method of producing content.
However, even such a trivial thing can be transformed into something bigger as it’s shown by a Microsoft Office feature called the Office Clipboard.
The Office Clipboard is a space where you can store the data you copied and then use it across all the Office apps. It means that if you open the clipboards in Excel and Word, you will see the same items that can be used in both of the applications.
In this guide, we will show how to open the Office Clipboard and manage its contents.
Why Clear the Office Clipboard?
The Office Clipboard can store only up to 24 items, and when you add the 25th element to it, the very first one is automatically deleted. You may get into trouble if you desperately need that first item and don’t remember where you copied it from.
There are more possible reasons why you may want to clear the clipboard:
- you need to use someone else’s computer and don’t want this person to know what you did there;
- you often work with confidential information and worry that it may leak out;
- you just want to make your work in Excel quicker by storing only the necessary data.
Fortunately, optimizing your clipboard is a quick task if you know how to do it the right way. So, let’s roll up our sleeves and get down to business.
Step 1. Open the Office Clipboard Task Pane
For Windows users, accessing the Office Clipboard is a real piece of cake:
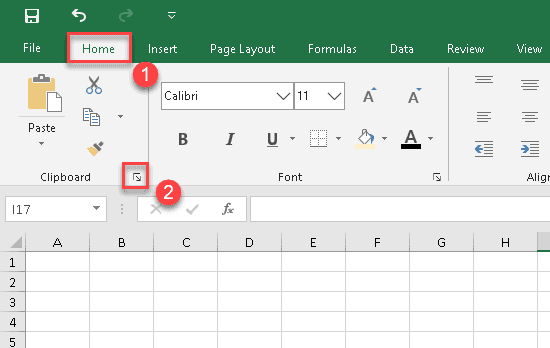
1. Click the “Home” tab.
2. Find the Clipboard group on the left side of the Ribbon and click the Clipboard dialog box launcher in the bottom right corner.
3. On the left side of the spreadsheet, you will see the Clipboard task pane where you can manage all the items stored there. Pay attention that there is a small icon next to each item, which shows its source.
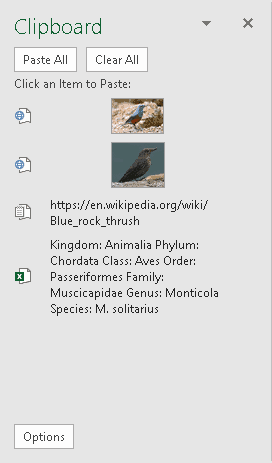
Step 2. Clear the Clipboard
Now let’s learn how to trim down your clipboard list.
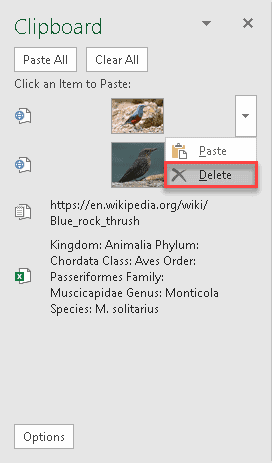
4. To delete an individual entry, hover over the item you want to remove in the Clipboard task pane. Then, click the drop-down button that appears and choose “Delete.”
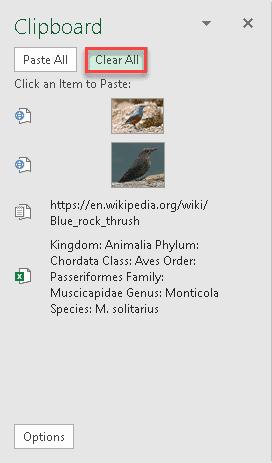
5. To clear the entire clipboard at once, click the “Clear All” button at the top of the Clipboard task pane.
Step 3. Customize Your Clipboard Settings
To make it easier for you to manage the clipboard, you can customize the Office Clipboard settings, saving yourself some time when copying or deleting any items.
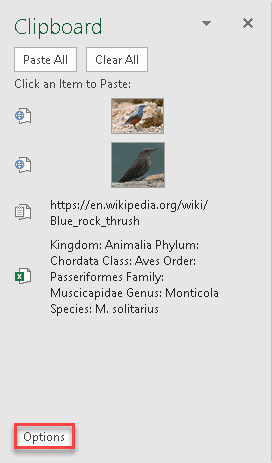
6. Click the “Options” button at the bottom of the Clipboard task pane.
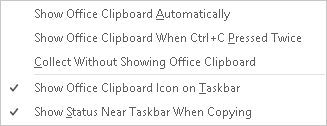
7. You will see the drop-down menu where you can change the Office Clipboard settings.
Let’s see what they can do.
Show Office Clipboard Automatically
This setting automatically displays the Office Clipboard whenever you copy an item. A good choice, but only if you use it all the time.
Show Office Clipboard When CTRL+C Pressed Twice
The Office Clipboard will be displayed when you press the CTRL + C combination twice in a row. This is a very convenient way to open it in a flash, and we highly recommend you enable this setting.
Collect Without Showing Office Clipboard
If this option is active, the new items are added to the Office Clipboard even when the Clipboard task pane is not displayed.
Show Office Clipboard Icon on Taskbar
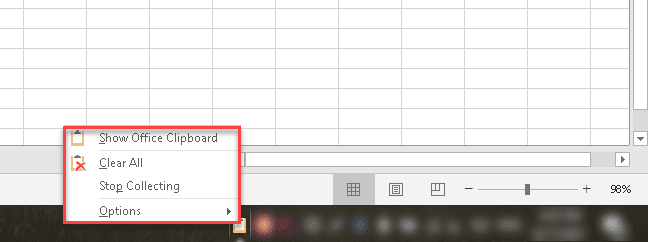
This setting adds the Office Clipboard icon to the status area of the system taskbar when the Office clipboard is active. You can right-click on it to quickly access the Office clipboard, clear all items, stop collecting the data, or change the settings.
The display of the Office Clipboard icon is turned on by default, and that’s how it looks like:
Show Status Near Taskbar When Copying
This setting is also enabled by default. When you copy something, it shows a message saying “Item collected” in the bottom right corner of your screen. A pretty useful option that allows you to track how much room is left in the clipboard.

In a nutshell, the Office Clipboard is a tool that is worth mastering. At least, now you know about its existence and can store the data you copy in a systematic and organized way.