
At times while working in Excel, you may find the need to delete every other row, or every nth row (3rd, 4th, 5th, etc.). The good news is that Excel provides the means to do just that. This feature can help you get rid of unnecessary rows in your sheet, which can be especially helpful when performing certain calculations.
Read on to find out how to get rid of certain rows so you can work with ease in Excel.
How to Delete Every Other Row
To delete every second row, start by creating an additional column so you can sort the rows into categories of even and odd numbers.
This step-by-step guide will show you how to do that:
1. Click on a cell (in the top row) to create the additional column (B1) that will be used to sort the rows.
2. Type a name for the column in that top cell (“Additional section”).
3. Select the next cell down (B2) and go to the Formula Bar to input the =MOD(ROW(),2) formula.
4. Drag the cursor from the corner of that cell to copy the formula into the cells below it, applying it to the entire original list.
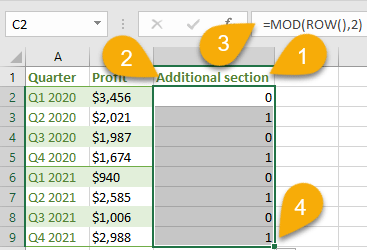
As easy as pie! Your rows have been alternately labeled as a 0 or a 1. Let’s keep the ball rolling.
5. Select all rows.
6. Navigate to the Home tab.
7. Click Sort & Filter.
8. Choose the Filter option.

9. Сlick on the small arrow next to the Additional section cell to sort by that column.
10. Tick the box next to the data you want to delete (either that which is marked with a 0 or that which is marked with a 1).
11. Click OK.
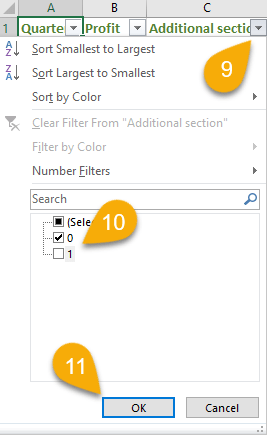
Now you can see the rows you intend to delete.
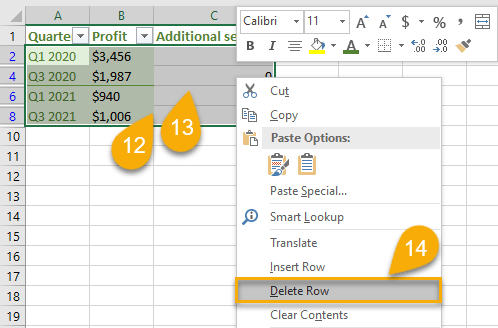
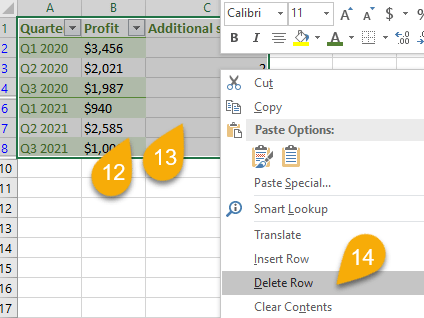
12. Select these rows in your sheet.
13. Right-click the mouse button on these selected rows.
14. Choose Delete Row.
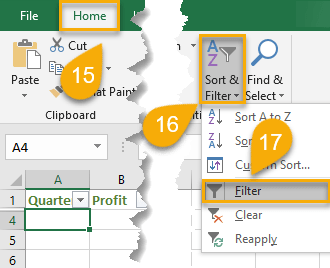
15. Navigate to the Home tab.
16. Go to Sort & Filter.
17. Select the Filter option to remove the filter.
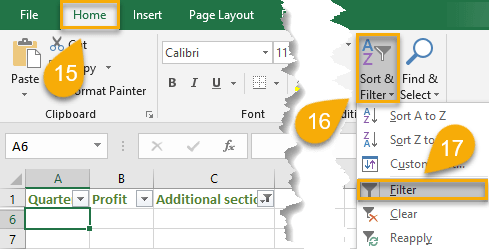
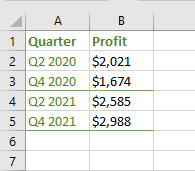
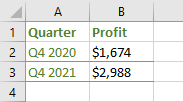
Just like that, you have successfully deleted the rows you do not need.
Related Article: How to Stop Excel from Rounding Numbers
How to Delete Every Nth Row
You already know how to delete even or odd rows in Excel. Let’s now take a look at how to delete every nth row. The process is very similar.
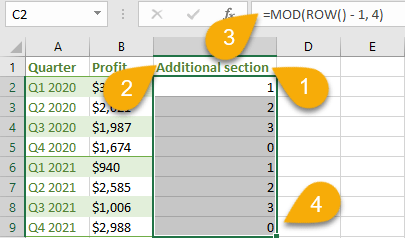
1. Click on the first cell of the additional column (C1) that will be used to sort the rows.
2. Type a name for the column.
3. Select the next cell down (C2) and go to the Formula Bar to input the =MOD(ROW()-m, n) formula, where…
- “m” is the row number with the “minus 1” indicator, which you want to delete, and
- “n” is the nth row.
4. Drag the cursor from the corner of the first cell down to the last cell in the list to copy the formula into each cell.
There you go! Let’s continue.
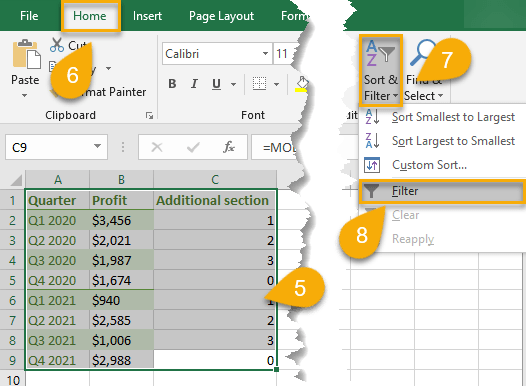
5. Select the data.
6. Choose Home.
7. Pick the Sort & Filter option.
8. Select Filter.
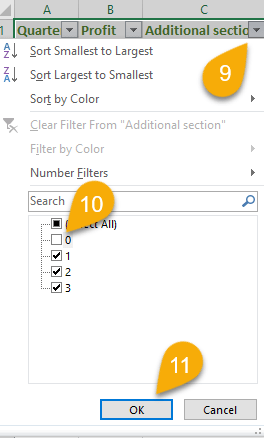
9. Сlick on the small arrow next to the “Additional section” cell to filter according to that column.
10. Tick the box next to the data you want to delete.
11. Click OK.
12. Now that the data has been filtered to show those particular rows, select the data.
13. Right-click the mouse button on the selected data.
14. Choose Delete Row.
15. Go to the Home tab.
16. Navigate to Sort & Filter.
17. Click on the Filter button again to cancel the function.
That’s all. Easy as ABC! Now you can easily sort and remove rows from your Excel sheet as needed.
If you’re having a hard time following the steps in this tutorial, chances are, it has to do with Excel filter not working correctly. We created a separate guide to help you troubleshoot the issue.
