To remove a password from an Excel file, go to the Review tab, choose the Unprotect Sheet option, type your password, and click OK.
The following are various ways to remove your password from an Excel file.
Quick Jump
ToggleMethods to Remove a Password from an Excel File
Take a look at the solutions below to help you remove a password from an Excel file.
Method 1: Using the Review Tab
Difficulty: Beginner
Time Estimate: 10 Seconds
1. Go to the Review tab.
2. Select the Unprotect Sheet option in the Changes section.
3. Enter the password that was applied to the document to protect it.
4. Click OK.
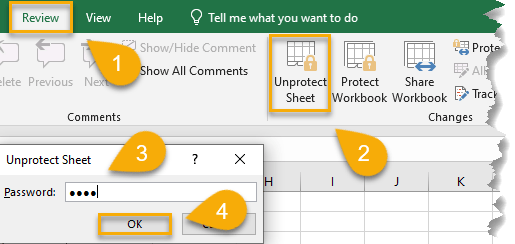
Easy-peasy! The password has been successfully removed.
Method 2: Using the File Tab
Difficulty: Beginner
Time Estimate: 20 Seconds
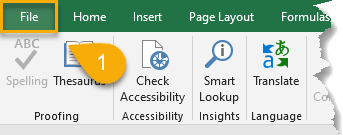
1. Navigate to the File tab.
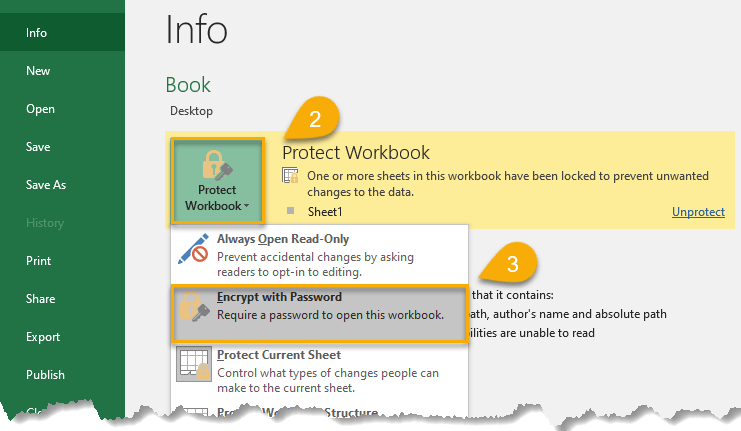
2. In the Info menu, click on the Protect Workbook option.
3. Select Encrypt with Password.
4. Type the password that was applied to the document.
5. Click OK.
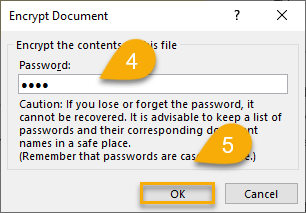
6. Confirm the action by entering the password again.
7. Click OK.
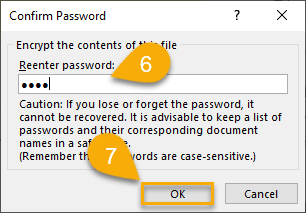
8. Go to the Save As option.
9. Choose the location where you want to save your Excel file.
10. Rename your file if necessary.
11. Hit Save.
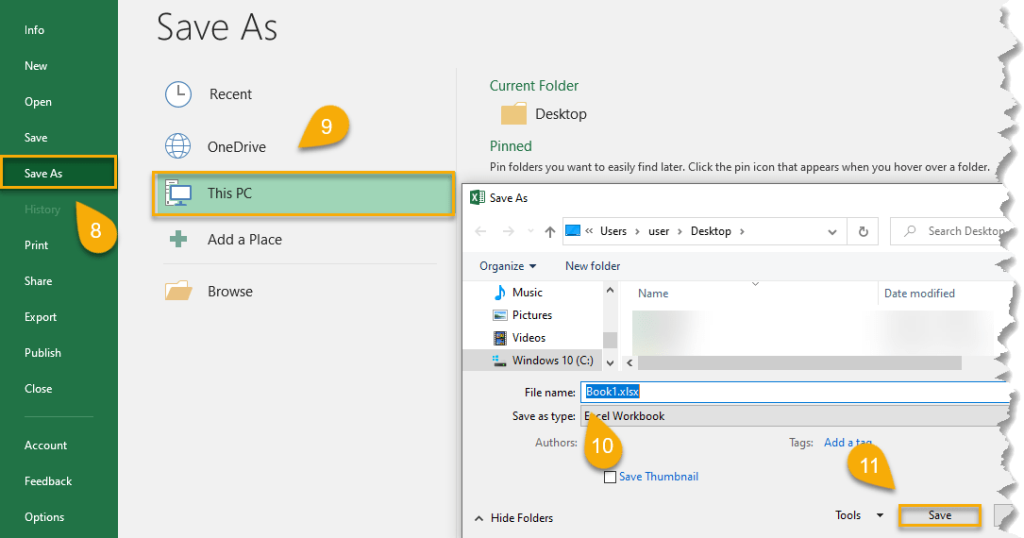
12. Open the saved file from the folder.
Voila! The password will be eliminated after saving the file.
Method 3: Using the Save As Feature
Difficulty: Beginner
Time Estimate: 25 Seconds
1. Navigate to the File tab.

2. Go to the Info menu and select the Protect Workbook option.
3. Click Encrypt with Password.

4. Enter the password.
5. Press OK.

6. Confirm the password.
7. Hit OK.

8. Navigate to the Save As option.
9. Choose the folder where you need to save your document.
10. Rename your file if necessary.
11. Select Tools.

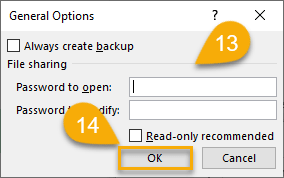
12. Pick General Options.

13. Remove passwords from these rows (“Password to open” and “Password to modify”).
14. Click OK.
15. Hit Save.

16. Select the saved file from the folder and open it.
Here you will see that the password has been removed.
Passwords on an Excel File FAQs
Here are some frequently asked questions and their answers to help you understand more about passwords.
Why do you need a password for Excel files?
There are some reasons why you might need to password protect an Excel file. Perhaps you need to share sensitive data with colleagues and want to make sure that only those who should have access to the file can open it. Or maybe you are creating a workbook that will be used by multiple people and you want to ensure that each person can only view and edit their own data.
In these cases, you need to preserve your data and ensure that only those with permission have access.
How to add access to an Excel file without a password
To add access to an Excel file without a password, right-click on the file, choose the .zip extension, and click Yes. Next, select the zipped file and choose Extract All. Tap Extract, open the XL folder, then go to the worksheets folder. Navigate to the XML file in the notepad and select the file with the word protection. Next highlight the text, go to the File tab, and click the Save tab. Each XML file should be processed in the same way. Navigate to your zipped file, select all the files, click Send to and Compressed (zipped) folder. Type the name with .xlsx extension. Then click Yes and open your file.
What passwords are strong?
A strong password should be at least 8 characters long and include a mix of upper and lowercase letters, numbers, and symbols. Avoid using easily guessed words like password or easy-to-guess number sequences like 123456.
Instead of traditional passwords, consider using passphrases for strong, easy-to-remember passwords. A passphrase is simply a string of multiple words strung together. For example, “Ihavetotakeacallbeforemyappointment” would be an effective passphrase. While it may be longer than a traditional password, it is also much harder to guess.