Sometimes when you’re working with an Excel file, you find yourself running into trouble when it’s time to save it. There are a few reasons why Excel won’t save your file. And we’re going to cover them below.
Quick Jump
Toggle4 Reasons Why Your Excel Document Does Not Save
Below you’ll find four common reasons why your Excel document is having issues when it comes to saving, along with solutions to the problem. Let’s take a look at them one by one!
Reason 1: Disk Space Is Full
One reason why you cannot save your Excel document may be because you do not have enough free space on your computer. If your computer’s disk is full, a message will pop up telling you that there isn’t enough disk space on your drive.
Solution
If you do not have enough free space, try deleting unnecessary files or programs to free up space so you can save your Excel file without trouble.
Reason 2: Invalid Filename
If you try to save a file in Excel and receive the error message The file name is not valid, this is because the filename contains one or more characters that are not allowed in a filename.
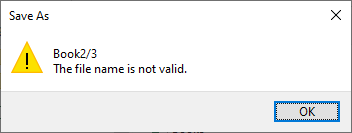
Invalid characters include backslash (\), slash (/), greater than (>), less than (<), colon (:), quote (“), asterisk (*), or question mark (?).
Alternatively, your file name may be too long. There is a character limit for file names set by your operating system.
Solution:
To save the file, you will need to remove any invalid characters from the filename or shorten the file name and try saving again. If you are unsure which character is causing the problem, try saving the file under a different name. If you still cannot save the file, there may be another issue causing the problem.
Let’s take a look at a couple more reasons!
Reason 3: Access Restricted
If you want to save an Excel document and receive an error message, you may be trying to save a document that is protected or blocked by security settings. When a file is marked as read-only, it cannot be edited or saved until the read-only restrictions are removed.
Solution:
In order to allow access to your file, you must follow these steps:
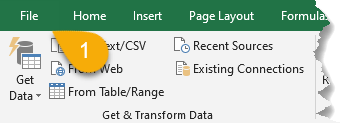
1. Go to the File menu.
2. Click Save As.
3. Pick the location where you want to save your file.
4. In the Save as type drop-down menu, select Excel Workbook (*.xlsx).
5. Click Save.
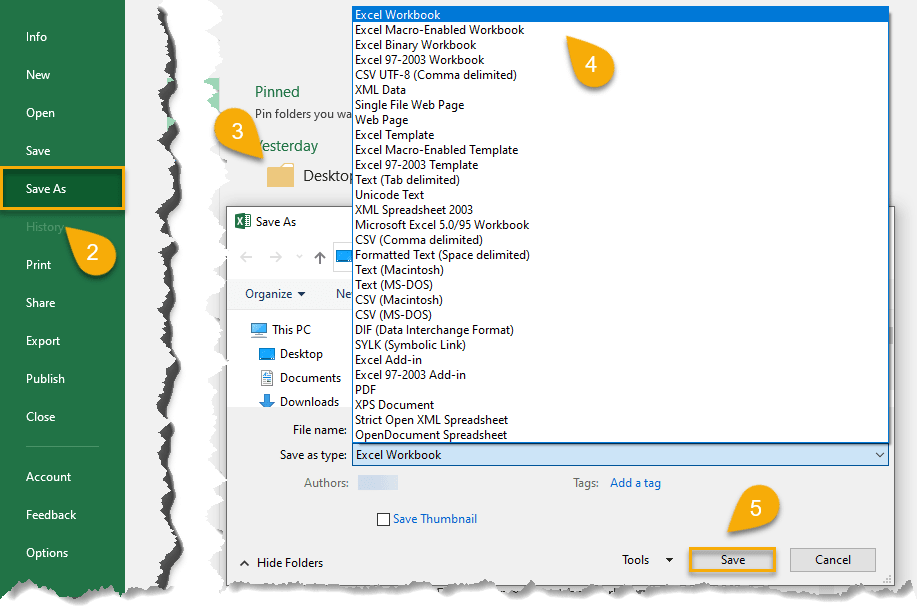
This will remove the read-only restriction and allow you to save your document.
Reason 4: Document Not Saved or Document Not Completely Saved
If you receive the error message Document not saved or Document not completely saved, it means your document was partially saved before an error occurred. This can happen if there’s a problem with your computer or with Excel itself or if you cancel the save operation while saving is in progress.
Solution:
To address this issue, do the following:
1. Open the temporary (unsaved) file.
2. Copy all the data from this file (Ctrl+A/Cmd+A to select all and Ctrl+C/Cmd+C to copy).
3. Next, open a new document and paste the data into the new document (Ctrl+V/Cmd+V to paste).
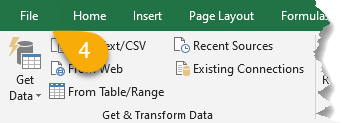
4. Navigate to the File tab.
5. Select Save As.
6. Choose a location where you want to save your file.
7. In the Save as type drop-down menu, select Excel Workbook (*.xlsx) or Excel Macro-Enabled Workbook (*.xlsm).
8. Click Save.
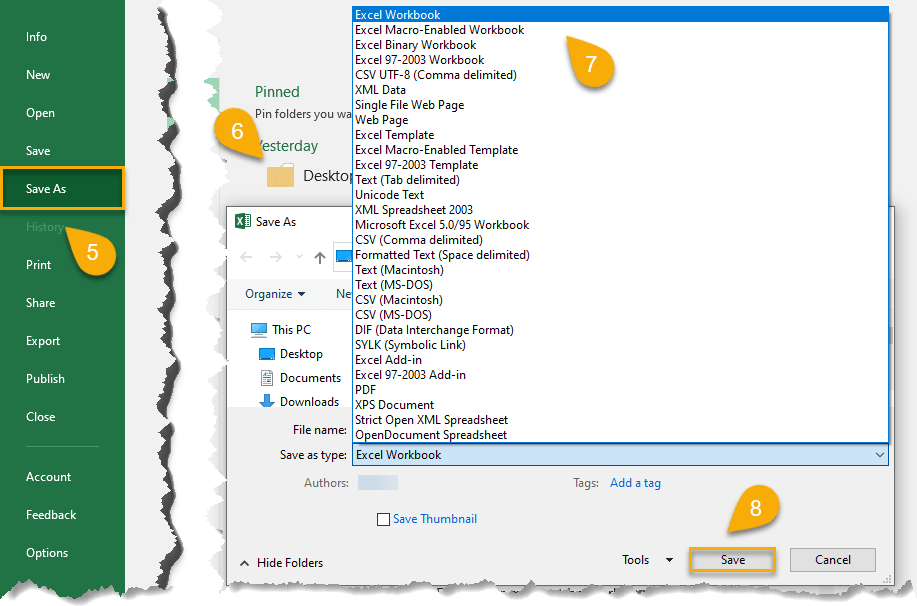
This way, your document will be saved as a file type that Excel can open.
Use these methods to troubleshoot any saving issues you may have, if necessary. If none of these procedures work, restart your device and try again.