To protect particular cells in an Microsoft Excel document without protecting the entire sheet, select cells you need to protect, go to the Home tab, click on the Format option, choose Format cells, select Protection, check the Locked option, and click OK.
Let’s take a look at a step-by-step guide to avoid missing anything important in this process!
Methods to Protect Cells Without Protecting the Entire Sheet in Excel
Before using one of the methods below, be sure to unlock all cells in the worksheet. Here’s how to do that.
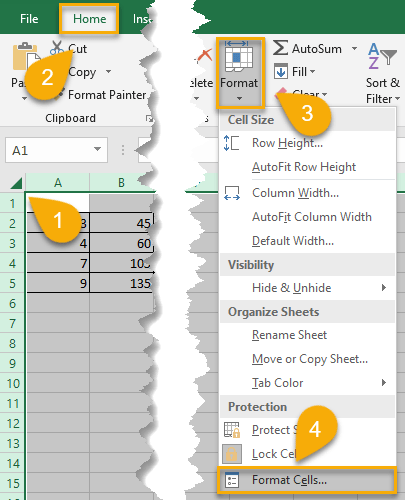
1. Select all cells by clicking on the little triangle in the upper left corner of the spreadsheet.
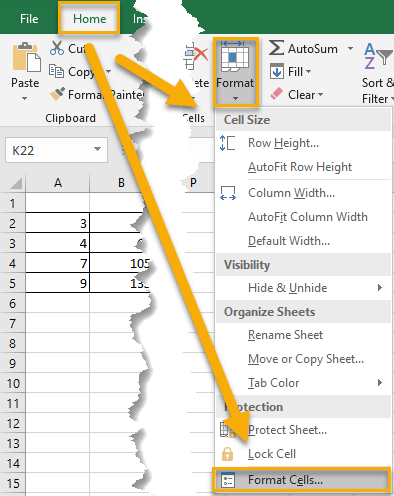
2. Go to the Home tab.
3. Pick the Format option.
4. Click on Format cells.
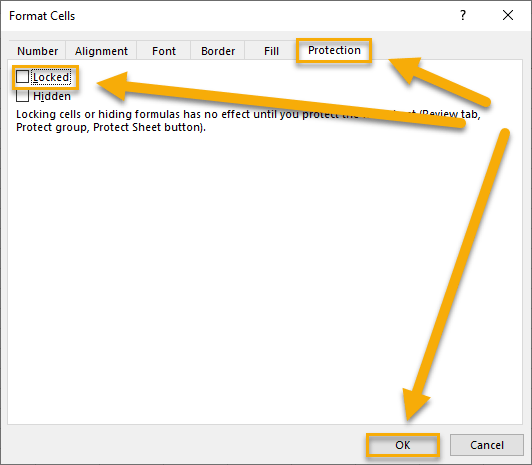
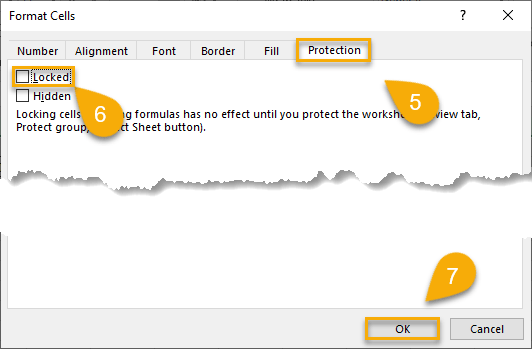
5. Choose Protection.
6. Uncheck the Locked option.
7. Click OK.
Now we can move on to locking certain cells!
Method 1: Using the Format Option
Difficulty: Beginner
Time Estimate: 1 minute
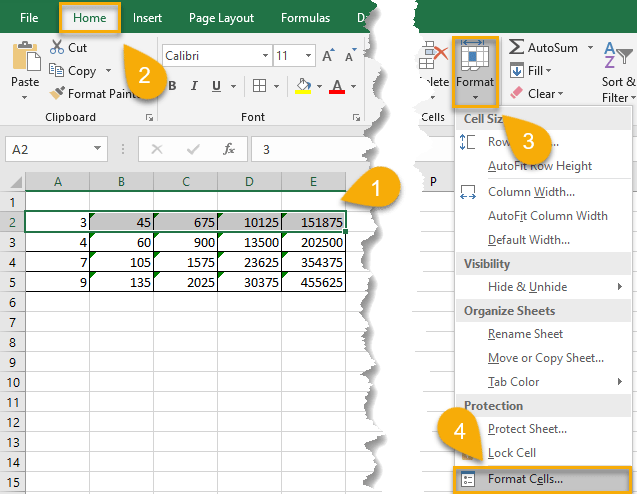
1. Highlight all the cells you need to lock.
2. Navigate to the Home tab.
3. Click on the Format option.
4. Choose Format cells.
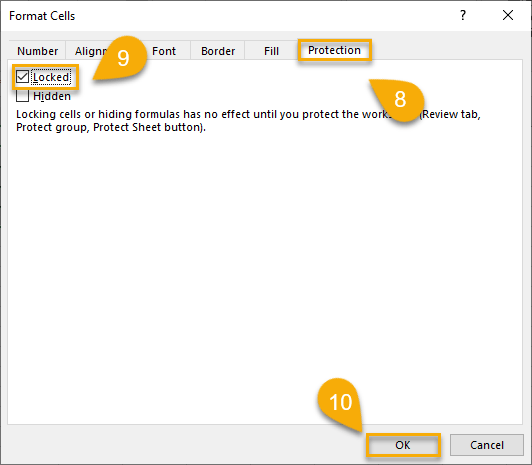
5. Click on the Protection tab.
6. Check the Locked option.
7. Click OK.
Once you protect your worksheet, your locked cells will be protected from editing. Let’s give it a try to see how it works.
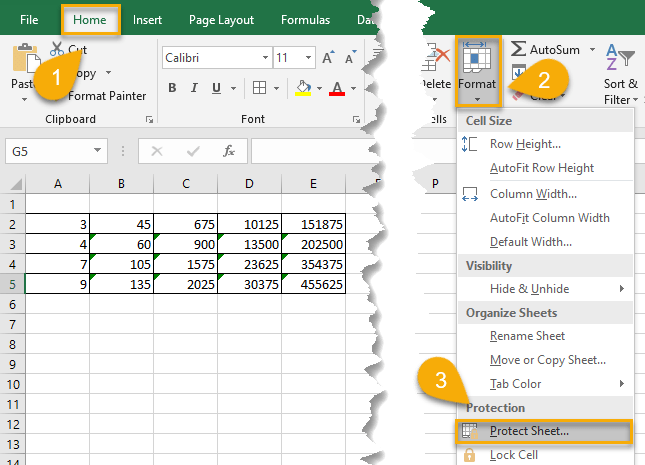
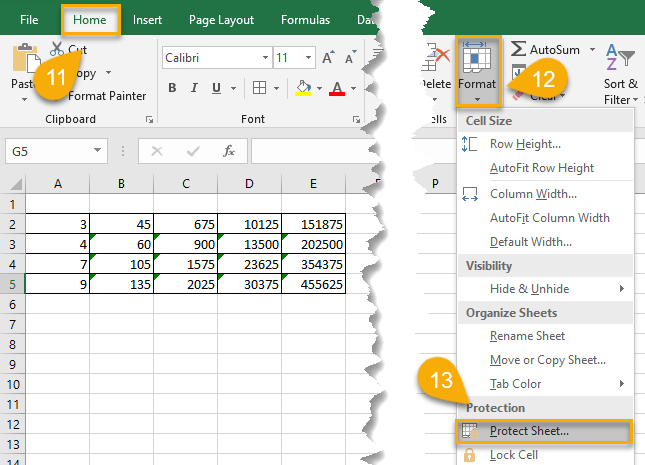
1. Click on the Home tab on the menu.
2. Choose the Format option.
3. Select Protect Sheet.
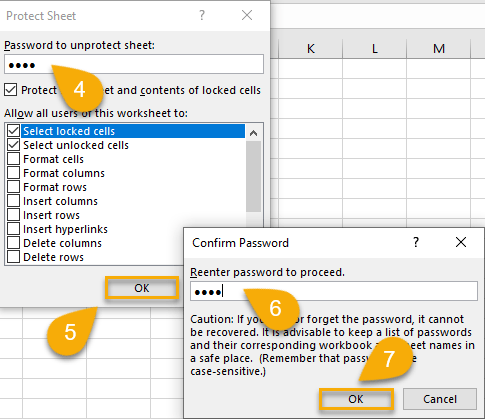
4. Type a password to protect the sheet.
5. Click OK.
6. Reenter the password to proceed.
7. Click OK once more.
There you go! If you attempt to change the data in these cells, the following warning will appear on the screen:

This means access to those cells is locked. You can remove the block when you unprotect the worksheet.
Method 2: Using “Allow Users to Edit Ranges”
Difficulty: Beginner
Time Estimate: 1 minute
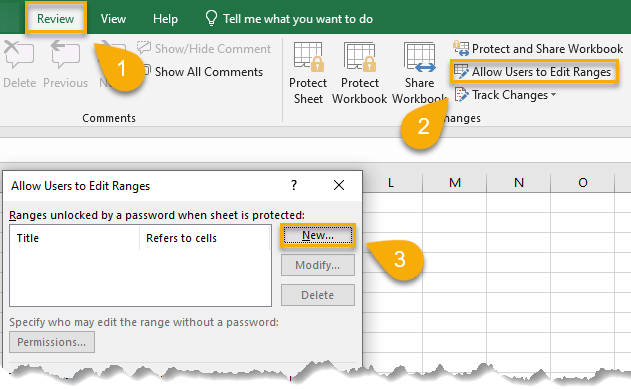
1. Navigate to the Review tab.
2. Pick the Allow Users to Edit Ranges option.
3. Click New in the dialog box that appears.
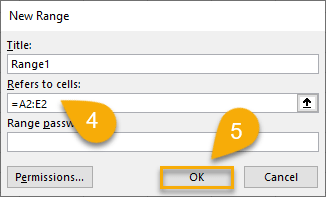
4. Add the range of cells to which you want to apply this.
5. Click OK.
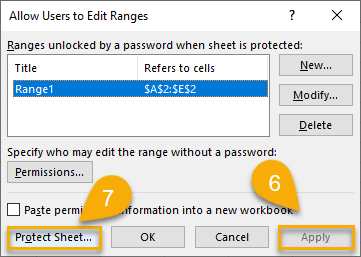
6. Click Apply.
7. Select the Protect Sheet button.
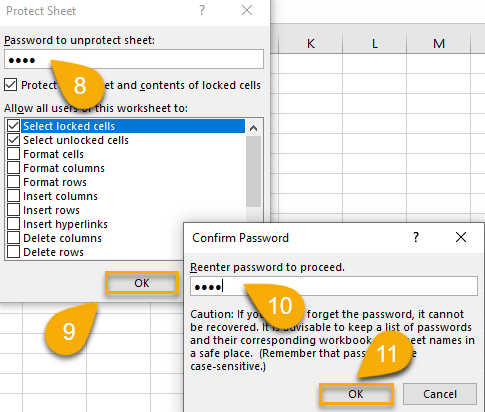
8. Enter a password to protect the sheet.
9. Click OK.
10. Confirm password to proceed.
11. Click OK again.
Now the cells are locked. Clicking on the locked cells displays the same warning from before. If you unprotect the sheet, that cell range will now be available for editing.
Method 3: Locking Formula Cells
Difficulty: Beginner
Time Estimate: 2 minutes
This method is intended for those who have applied formulas to their data and don’t want the formulas being deleted or overwritten by accident.
1. Navigate to the Home tab.
2. Click Find & Select.
3. Pick the Go To Special option.

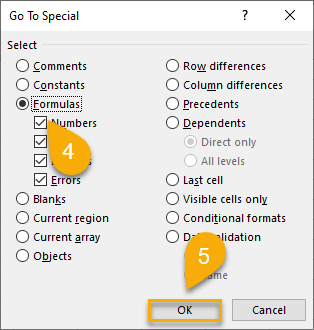
4. Select Formulas.
5. Click OK.
Now, all the cells with formulas applied to them are selected.
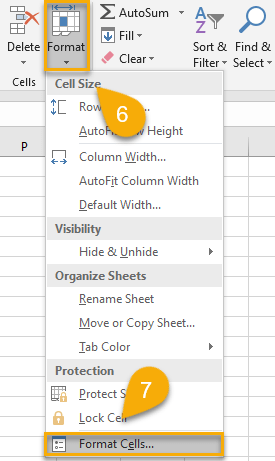
6. Select Format on the menu.
7. Pick Format cells.
8. Click on the Protection tab.
9. Check the box next to the Locked option.
10. Click OK.
11. Navigate to the Home tab.
12. Pick the Format option.
13. Select Protect Sheet.
14. Type a password to protect the sheet.
15. Click OK.
16. Reenter password.
17. Click OK again.

If you try to change the data in these cells, the warning appears again. Now, even if a password is entered to unprotect the sheet, the formula cells will remain locked from editing.
Locked Cells in Excel FAQs
Read the following frequently asked questions to learn more about protecting cells on an Excel spreadsheet.
What does protecting a cell in Excel do?
If you lock a cell in Excel, it means that you are preventing others from making changes to that cell. Protecting a cell in Excel will protect the data from being edited or deleted. This is useful if you want to make sure that certain data is not accidentally changed or deleted.
What is the difference between a locked and unlocked cell in Excel?
A locked cell is a cell that cannot be edited. An unlocked cell is a cell that can be edited. You can lock or unlock cells in Excel by using the methods described above.
How do I unlock a cell?
To unlock a cell, start by selecting the cell you wish to unlock. Next, go to the Home tab and pick Format Cells from the drop-down menu.
Go to the Protection tab, uncheck the Locked box, and click OK.