
Have you ever received an important Excel file from your colleague only to realize that it was saved as a read-only workbook, and you cannot make any changes?
If so, you definitely know that this not-so-common scenario can be incredibly frustrating. In this step-by-step tutorial, we will describe the possible reasons for an Excel document to be read-only and explain how to handle each of them.
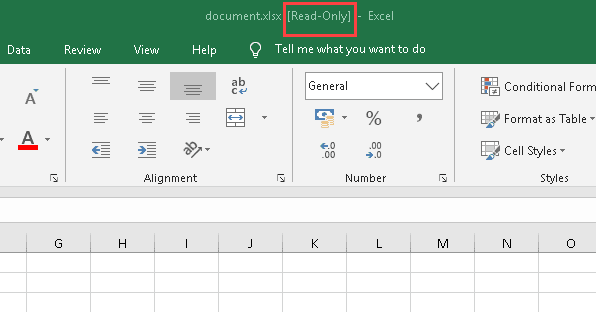
What Does It Mean When an Excel File Is Read-Only?
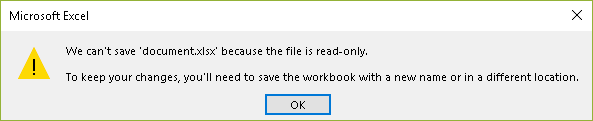
Read-only is a file attribute that allows you to view a workbook but makes it impossible to change it. You can open it and even add or delete something. However, when you try to save the changes, a warning will pop up.
It makes sense that the read-only attribute is often used to secure files of extra importance. It might come in handy to:
- prevent other users from making changes;
- avoid making accidental changes on your own;
- protect essential system files.
Although read-only is a pretty useful feature, it can lead those who don’t know how to use it to quiet desperation.
Let’s move to the practice part.
Case #1: Removing the Read-Only Recommended Option
When you save an Excel file, you can choose an option that will apply the read-only attribute.
If you want to ignore this recommendation, just click “No” in the pop-up window that appears when you try to open the document.

But what should you do if you want to get rid of the read-only attribute for good? Here’s what you need to do:
1. Click “Yes” to open the file in the read-only mode.

2. Click the File tab.
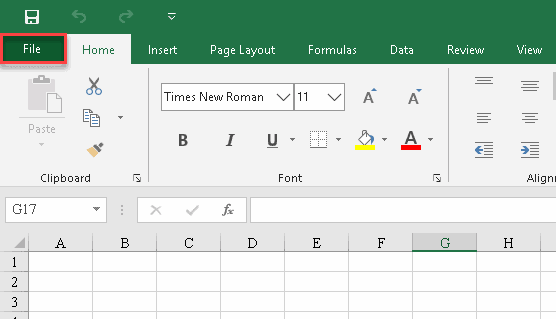
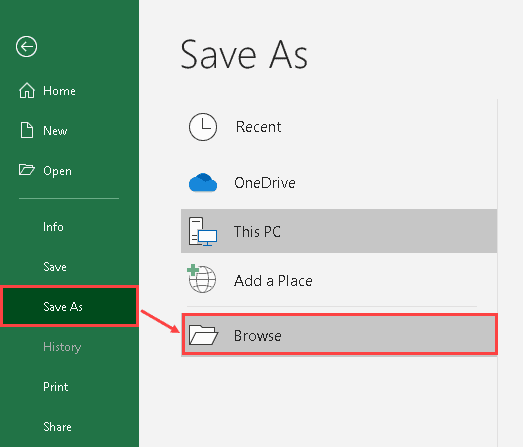
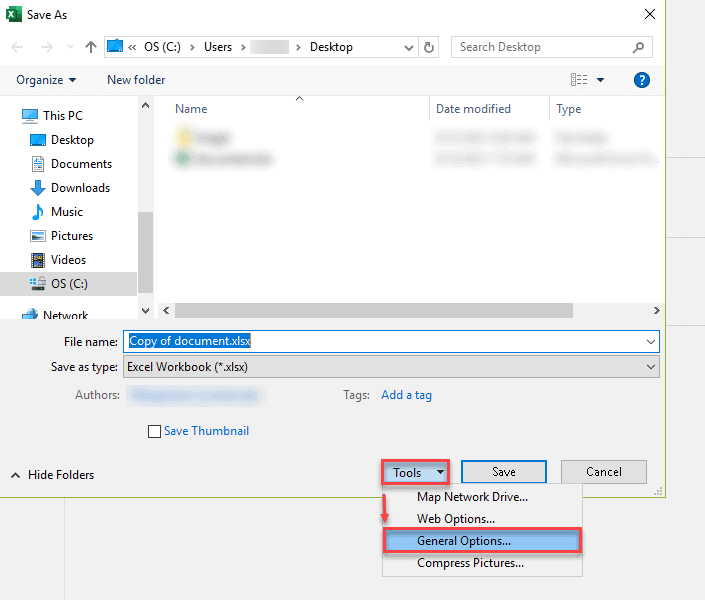
3. Choose “Save As” and click “Browse.”
4. In the “Save As” dialog box, expand the “Tools” drop-down list and choose “General options…”
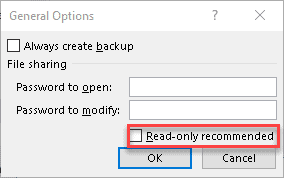
5. In the “General Options” dialog box, uncheck “Read-only recommended” and click “OK.”
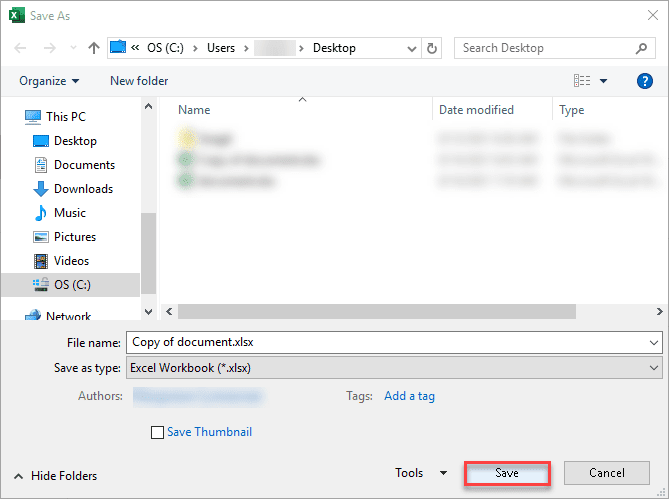
6. Go back to the “Save As” window and click “Save.” This will create a copy of the original file that you can edit without the read-only attribute applied to it.
Case #2: Unlocking Password-Protected Excel Files with Read-Only
When it comes to file encryption in Excel, the user can set the password to restrict others from opening or modifying it. While in the former case it may be difficult to deal with unless you use special software, the latter one is not an issue at all.
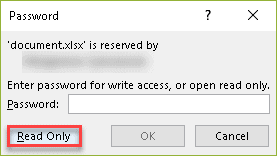
1. Click “Read Only” to open the file.
2. Click the File tab.
3. Choose “Save As” and click “Browse.”
4. Click “Save” to create a copy of the file. Once there, you can do whatever you want with it.
Case #3: Unlocking Password-Protected Workbooks or Worksheets
Not only does Excel allow you to protect the whole file, but it also supports workbook- and worksheet-level encryption.

Unfortunately, even if you save the file as a copy, it won’t solve the problem, and you still won’t be able to make any changes.
The quickest and easiest way to do it is to ask the person that created the file to share the password. Then do the following:
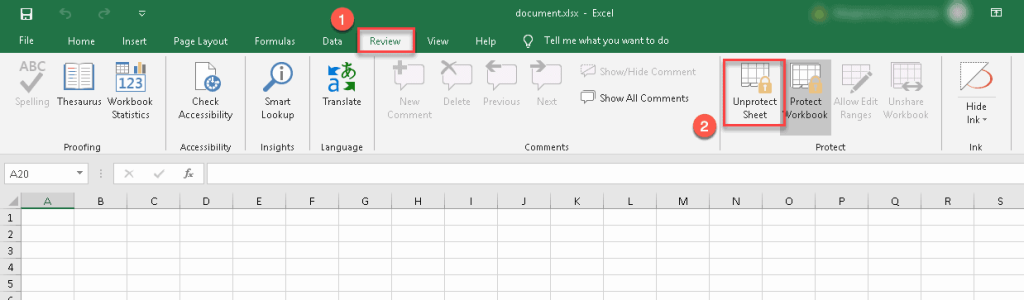
1. Choose the tab “Review” in the Ribbon.
2. Click “Unprotect Sheet” in the “Protect” group.
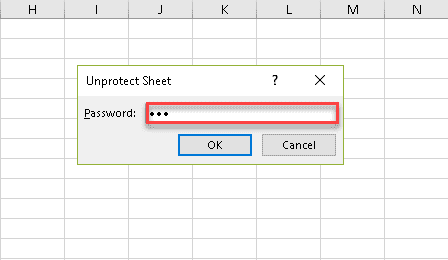
3. In the dialog box that appears, enter the password and click “OK.”
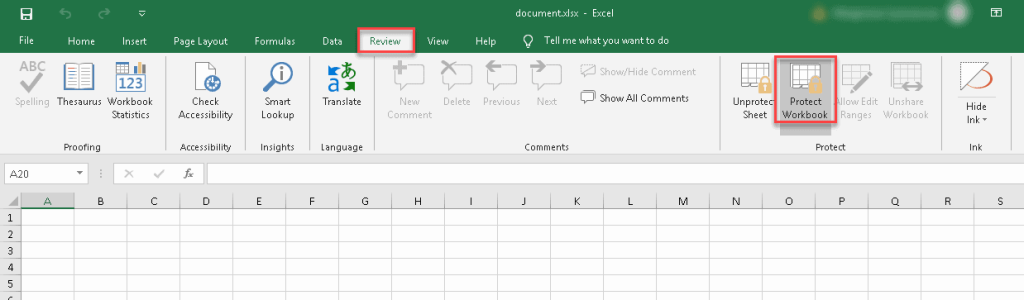
4. If you’re dealing with a protected workbook, click “Protect Workbook.”
5. Enter the password and click “OK.”
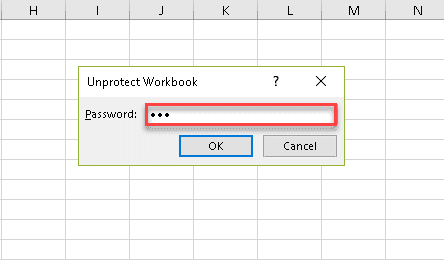
Easy-peasy! After you have saved the document, all of the restrictions will be removed.
Case #4 Disabling Read-Only in “Marked as Final” Excel Files
There’s one more way of how you can discourage users from editing your precious document. It’s possible to mark it as final to let everybody know that you don’t want them to make any changes whatsoever.
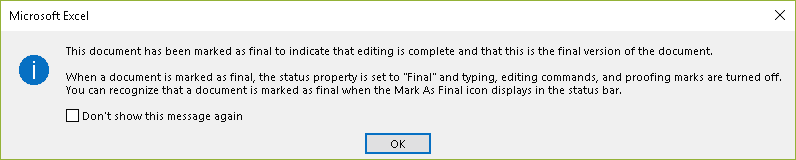
When opening such a document, you will see the yellow Message Bar. To ignore the warning message, just click the “Edit Anyway” button.

Marvelous! Now you can effortlessly tackle the most common causes of your Excel document being marked as read-only and make your Excel experience a breeze.
