
By default, if you have ever tried to pack a large amount of data into one cell – be it a long username or number – you usually end up having that text run across multiple cells, making your spreadsheet look messy and unorganized.
Fortunately, this issue can be quickly solved using a few simple built-in Excel features that allow you to wrap text and display cell contents without overflowing into other worksheet cells – no matter how much data you put in there.
This step-by-step guide will show you how to automatically wrap text in Excel as well as how to insert a line break manually.
Also, we have a separate guide covering how to wrap text in Google Sheets to help you up your spreadsheet game.
How Text Wrapping Works in Excel
The column width in Excel depends on the default font of the workbook, but the standard setting is just 8.43 characters. Once you’ve exceeded this number, there are two possible scenarios:
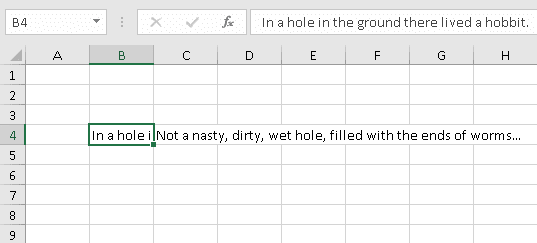
1. If the adjacent cells are empty, the text extends beyond the boundaries of the cell, running over the cells in the same row to fully display the cell content.

2. If the adjacent cell already contains some data, the text stays within its own cell, and you can see only the part that fits the column width.
And what does the wrap text feature do in Excel? It kills two birds with one stone: it makes sure that the entire cell contents get displayed without running over other cells – no matter how much data you decide to pack into that cell.
Of course, you can just double-click on the column border to automatically adjust its width and autofit column width, but that takes time and effort that you can save using with the help of a few simple tweaks.
Read: How to Make Text Vertical in Excel
How to Wrap Text in Excel Using the Wrap Text Option
Wrapping text in Excel is a simple task that can be done straight in the Ribbon. Here’s how you can do it:
1. Select one or more cells that you want to format.
2. Click the Home tab.
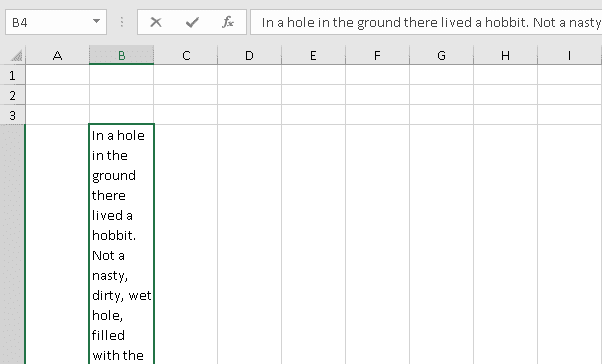
3. In the “Alignment” group, click the “Wrap text” button.
Useful note: alternatively, you can use the Alt + H + W keyboard shortcut to do the same thing.
Easy-peasy! We’ve reached our goal, and that’s how the wrapped text looks like:
However, there are some more things we can do to improve it:
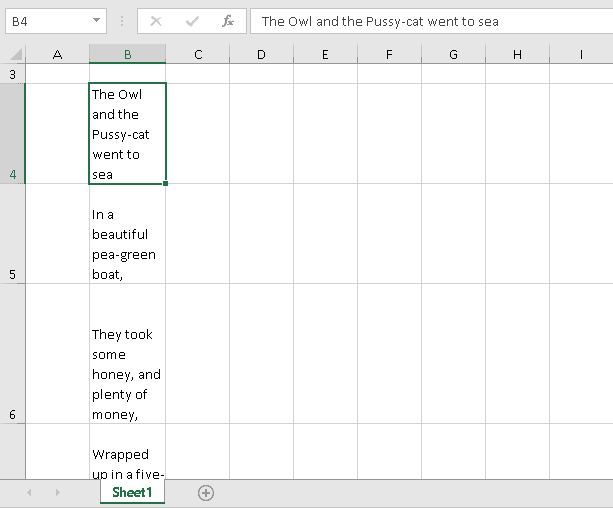
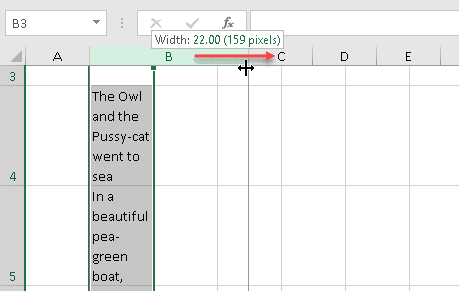
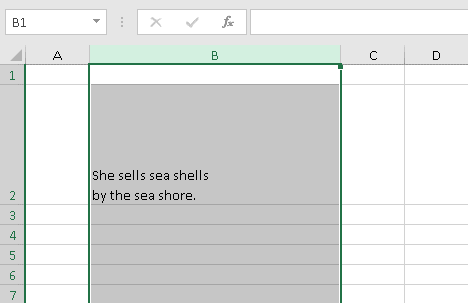
4. Click the header boundary of column B and drag it to the right to adjust the width of that column.
5. In the Home tab, navigate to the “Cells” group and click “Format.”
6. In the drop-down menu that appears, click “AutoFit Row Height.”
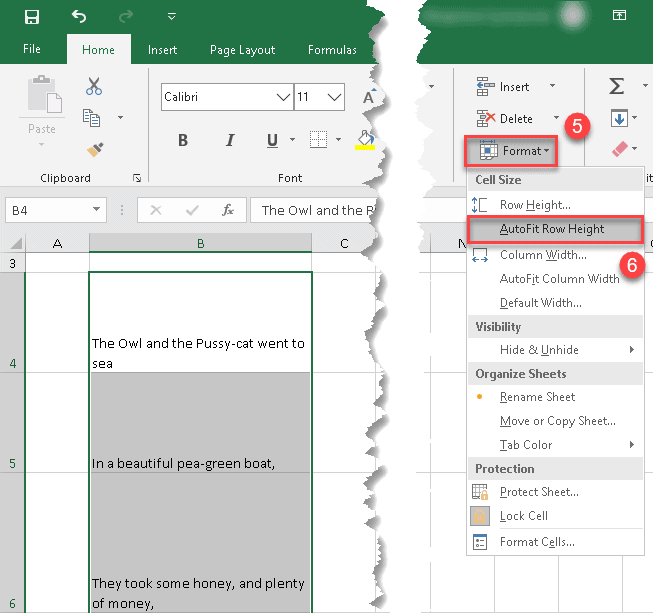
Useful note: you can skip steps 5 and 6 by selecting the rows that you want to format and double-clicking on their border.
Congratulations, now it looks nice and tidy.

If this method doesn’t work, try to unmerge the cells you’re trying to wrap – check out our quick-and-dirty guide covering how to unmerge cells in Excel.
How to Wrap Text in Excel Using the “Format Cells” Dialog Box
This method takes longer than the previous one, but it may come in handy if you want to change a couple of settings at once, for example, to wrap text and adjust text alignment.
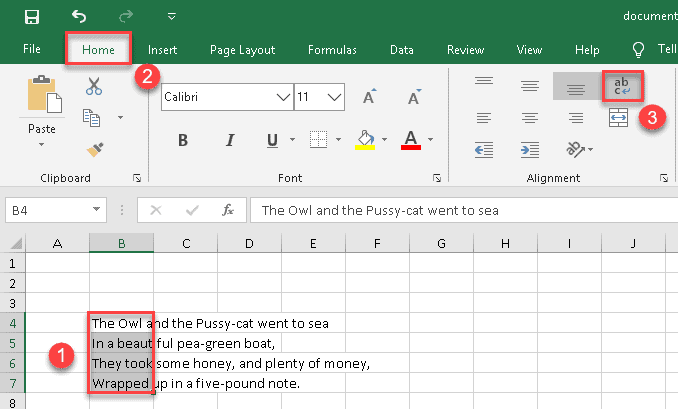
1. Select a cell or group of cells that you want to format.
2. Click the Home tab.
3. In the “Alignment” group, click the “Alignment Setting” dialog box launcher (a small downward-pointing arrow at the bottom right corner).

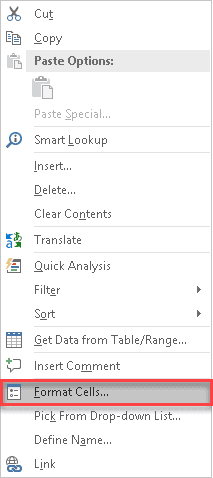
Useful note: alternatively, in order to open the “Format Cells” dialog box, you can also use the Ctrl + 1 shortcut or right-click on the selected cells and choose “Format Cells…” from the contextual menu that appears.
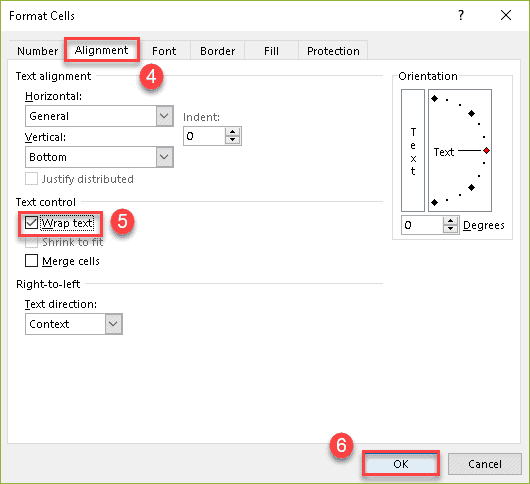
4. In the “Format Cells” dialog box that appears, switch to the Alignment tab.
5. Under “Text Control,” check the “Wrap text” textbox.
6. Click “OK.”
Awesome, now you’ve mastered one more way of wrapping text in Excel.
Pro tip: If you want to fit more text in a single cell without ruining the formatting, you may want to change line spacing in Excel.
How to Add Line Breaks to Wrap Text in Excel
Last but not least, we will show you one more method that can move a certain part of your text to a new line within the same cell by inserting a manual line break.
1. Double-click on the cell that you want to modify (in our case, it’s B2) to enable editing (or press the F2 key).
2. Put the cursor where you want to add a break (for illustration purposes, we have decided to put it before the word “by.”)
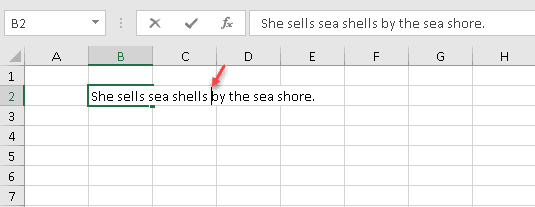
3. Press the Alt + Enter shortcut (while holding down the Alt key, press Enter).
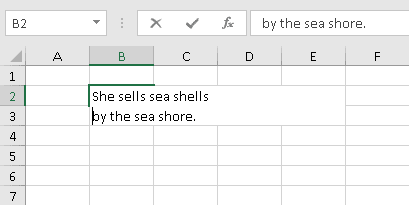
As you can see, the text after the cursor has been shifted to the next line in the same cell. Additionally, the “Wrap Text” option was automatically activated.
What’s the difference between just wrapping text and adding a line break? In the latter case, if you try to make the column wider, the formatting will stay the same.
FAQs
What Does It Mean to Wrap Cells in Excel?
In Excel, wrapping text (or cells) means that the text or cells will continue on to the next line or lines, as needed, instead of being cut off at the edge of the cell or cells. This is helpful when you want to fit a lot of information into a small space.
What Is the Difference Between Wrapping Text and Adding a Line Break?
Wrapping text is the process of automatically adding line breaks and/or spaces between words so that all text fits on one line. This can be helpful when you have a lot of data or text that doesn’t fit in the cell’s width.
Adding a line break is the process of manually inserting a break between two lines of text. This is helpful when you want to start a new paragraph without affecting the rest of your text.
Why Do We Need to Wrap Text in a Spreadsheet?
There are a few reasons why wrapping text in a spreadsheet is important. First, it allows you to control the alignment and positioning of the text relative to other cells or text. Second, it makes it easier to format text (e.g., making it bold, italicized, underlined, etc.).
Third, by wrapping text in a cell, you can ensure that the data in that cell is properly formatted and doesn’t run over into adjacent cells.
Finally, wrapping text in a cell can be helpful when you want to include long pieces of text in your spreadsheet (e.g., headings or notes).
